
Microsoft Teams for Students
MS Teams is a powerful team-based collaboration tool that provides group chat, channeled conversations, instant messaging, live document collaboration, audio or video calls, and virtual class meetings.
Important Note About Teams
One key benefit of teams is that the chat and meeting messages and any recordings (optional) are maintained after the meeting ends. If someone cannot attend, they can still view the chat and any recordings. If you are asked to host meetings for projects, your instructor can easily check to see who attended, any chat messages, and how long the meeting lasted.
Step 1: Prepare your Devices
The ONLY way to have full functionality is to download the desktop application.
- Download the Teams app for Windows or Mac.
- Mobile apps are available for iOS, Android, and Windows Phone 10 from the respective app stores.
- Start the MS Teams application on your computer like you would start any application.
- When requested, login to the application using your UA login credentials.
- Remember to always open meetings in the downloaded application, when prompted. Do not open MS Teams in a browser.
- If your instructor holds Microsoft Teams online/live classes, you will need speakers and a microphone, which are built into most laptops. For better audio quality, you can also use headsets or ear buds (that have a microphone) — with Teams.
- Depending on your instructor's requirements, you may need a webcam, which is built into most laptops. Teams mobile apps also can use your smart phone's forward-facing camera.
Alert for MAC Users
We do NOT recommend that you use the Safari browser with the MS Teams widget in Brightspace. Safari has a new security feature that “prevents cross-site tracking.” You can either turn that off in the security settings of Safari, or, just try a different browser to use the MS Teams widget in Brightspace.
Step 2: Join a Teams Meeting
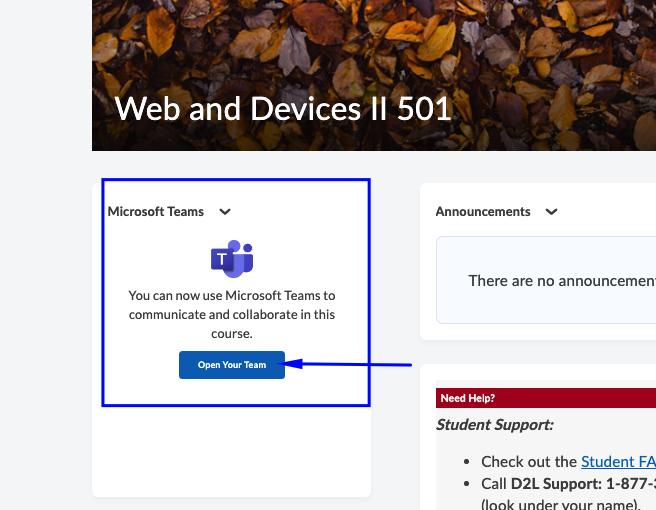
As your online class time approaches, you will need the "Open Your Team" link from your instructor. You will usually find this in your Brightspace course.
Here is a SAMPLE of a meeting link you may find on your course homepage:
Double Check Your Meeting Details!
Caution: If you do not click the appropriate link, you could end up in the wrong meeting. If you are unsure about the correct meeting to join, contact your instructor.
Your web browser may prompt you to select between the Web version and the desktop version. Select the option to open the Teams desktop version.

- You are not in the online session yet.
- Teams will display audio and video settings before you join the meeting.
- Your webcam may activate, showing you a preview. If you do not want to appear on camera, switch off your webcam by clicking the camera button.
- If you enable your camera, you also have the option to blur or change your background under the More Actions menu.
- Mute your microphone before you join the online class session. Press the audio button to speak, then press it again to mute.
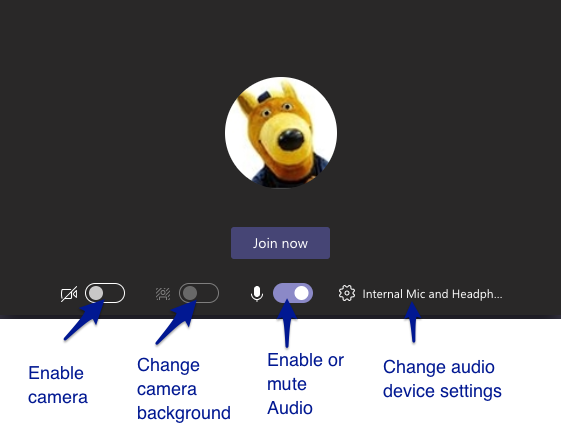
- Click the Join Now button to join the online session.
- If you are the first to join, you will see Waiting for others to join...
Step 3: Learn the MS Teams Interface
After you join a class in MS Teams, locate the control bar at the top of the course meeting. 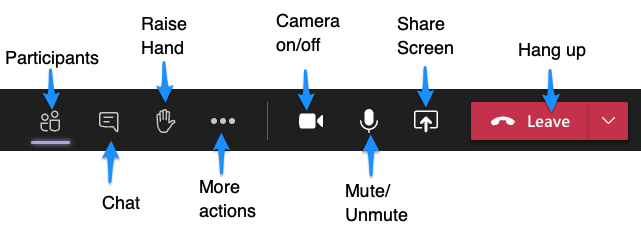
- Use the Participants icon to identify who is in attendance.
- To type questions or comments, click the Chat icon.
- When you would like to speak, use the Raise Hand icon to notify your instructor that you have a question or comment.
- Use the Camera on/off button to enable your video camera.
- Use the Mute/Unmute button to turn your microphone on or off.
- Use the Share Screen button to share something on your computer with the class.
- Use the Hang up button to leave the meeting.
- Under More actions menu, you can double check your audio and video device settings, change your video background, turn on live captions, and more. You may want to explore the More actions menu before the class starts.
- Use the Leave button when you are ready to exit the meeting.
Best practices
Remember that your instructor and other students will most likely not be able to monitor chat will they are presenting or speaking. Use the Raise Hand feature to notify the presenter when you have a question or comment. Your instructor will cue you when it is the best time to ask questions or add comments.
We recommend that you always Mute your microphone when you are not speaking. Use the Mute/Unmute button like a toggle - mute when you are not speaking and unmute when your instructor or team invites you to speak. If you start speaking while muted, Teams will notify you that Your microphone is muted.
Be sure to follow your instructor's guidelines for the types of chat messages that are appropriate for your online class. Note that this is group chat — not one-on-one chat. Remember that all student code of conduct rules apply in all class meetings.
If your instructor does want you to turn your video camera on, blur or change your background to protect your privacy and reduce distractions. To change your background, use the Apply background effects option from the More actions menu. This will open a panel on the right side of the screen with several background options.
If you have any audio issues, you can Turn on live captions from the More actions menu. MS Teams will attempt to convert all spoken text to written text that you can read. Closed captions will only display for you, your class will not know that you have it enabled.
If you are having poor network quality, MS Teams will alert you with a message that Your network is causing poor call quality. These are some things you can do:
- If you are using your webcam, click the camera on/off button to disable your video feed.
- On the More Actions menu, click the Turn off incoming video button to reduce the amount of network traffic you need for the meeting . This will only disable the video for you. The rest of the class will still be able to see the video.
Quick Tour of Teams
Here is a quick tour of the Teams interface.

Part 2: Advanced Topics
You may need to use MS Teams for any of the following:
- Working in groups by meeting in a channel within a larger class meeting.
- Hosting your own meeting for a group project or other class activity. In this case, your instructor would not need to be present.
Meet in a Channel
If your instructor wants your class to breakout into small groups for discussions, your instructor will create Channels in your Teams Class site.
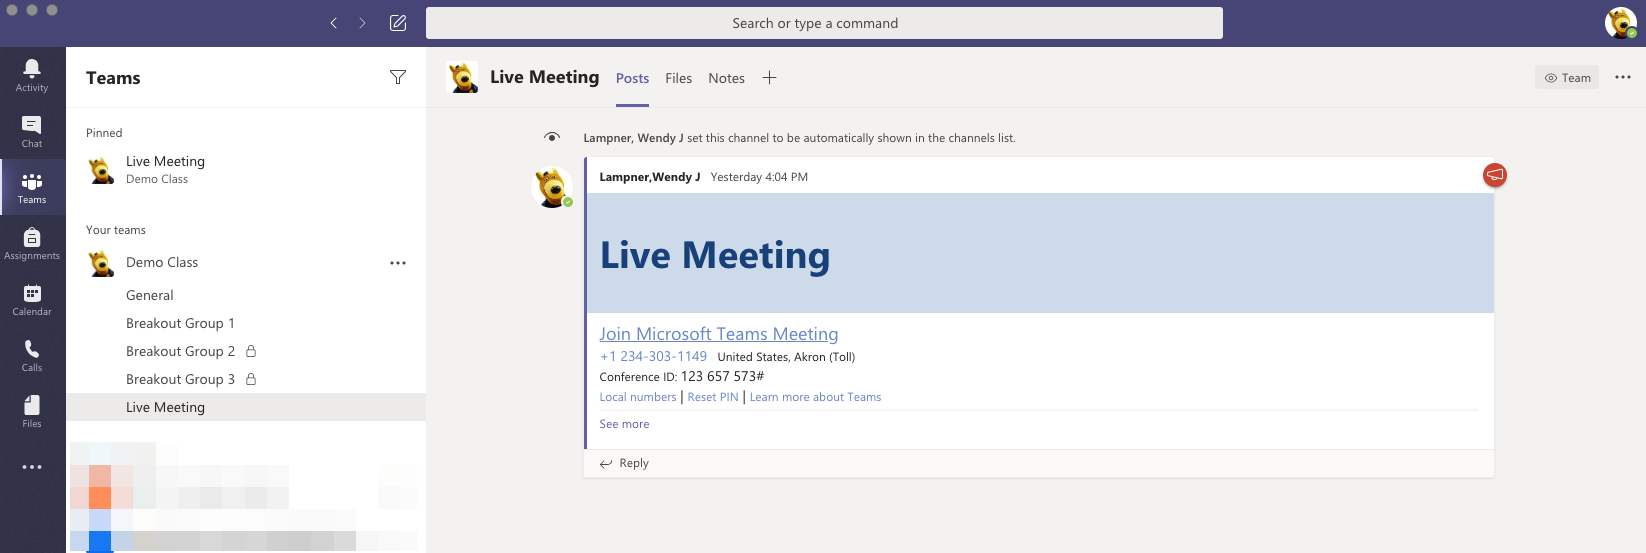
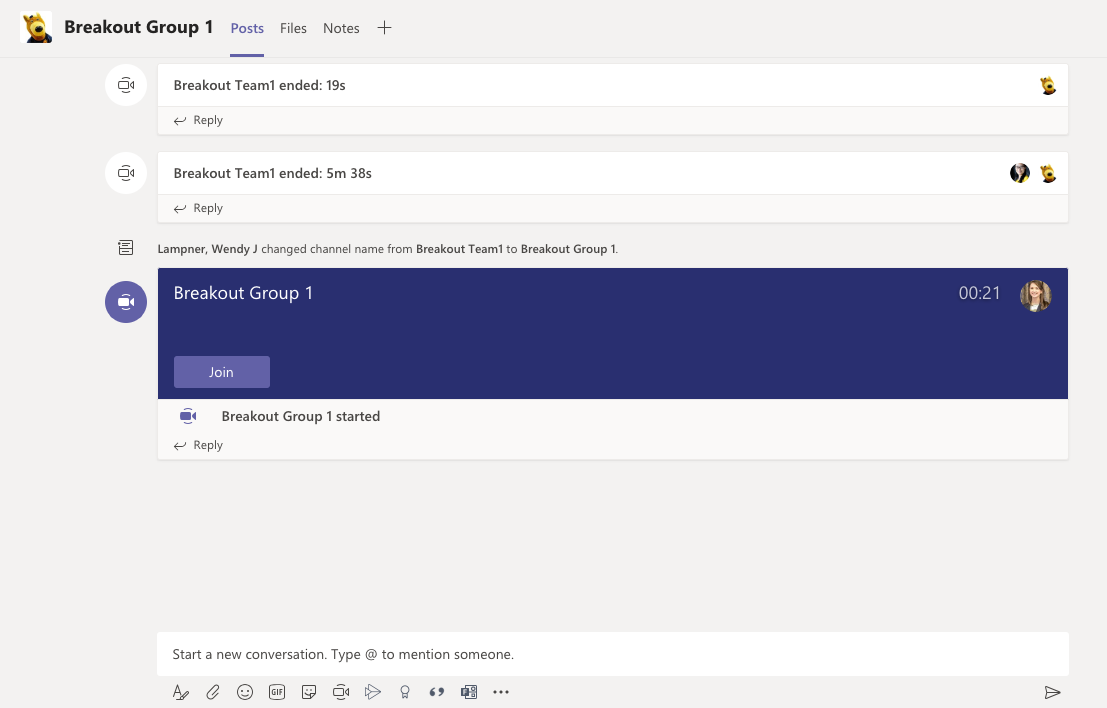
In this example, the instructor has created three channels for small group meetings. The instructor can choose the name for these channels. In the example shown, the rooms are Breakout Group 1, Breakout Group 2, and Breakout Group 3.
Your instructor will provide information about what channel you should use during a group meeting. If your instructor creates a private channel, only the members that have been added to the channel will be able to see this.
- When your instructor indicates that you should go into a breakout room, navigate to your assigned breakout channel. In this example, Zippy will enter Breakout Group 1.
- If the meeting has not started, use the Meet Now button to start a meeting.
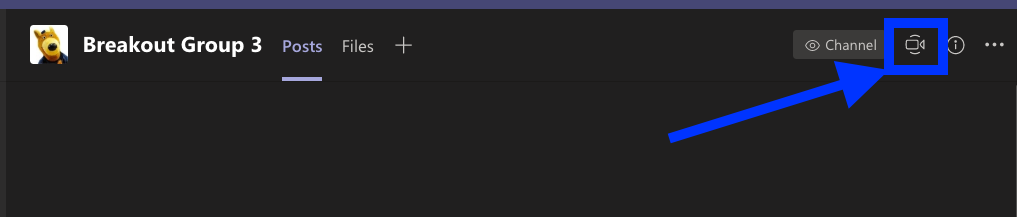
- Caution: Double check that a meeting is not already in progress. It is possible for more than one student to start a meeting. Your instructor may also designate a moderator or provide additional guidance regarding who will start the meeting in the breakout room (channel).
- If a meeting is in progress, use the Join button to join the meeting in the breakout room (channel).
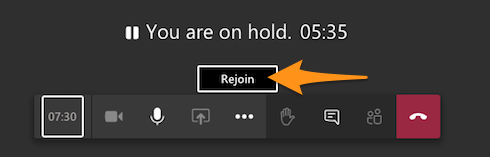
- When it is time to leave the breakout group meeting, you may be instructed to join the rest of the class. To do this:
- Hang up from your breakout group meeting.
- Click the Rejoin link for your main class meeting.
Host your Own Meetings
If you are working on a group project or other class activities, you can use your assigned channel in Teams to meet, post chat messages, or share files as needed.
Simply open your assigned channel and use the chat to post messages, use the Meet Now button  to start a meeting, or the Join button to join a meeting that is in progress.
How to Get Help
- https://support.uakron.edu
- support@uakron.edu
- (330) 972-6888
- Microsoft Support Website: https://support.microsoft.com/en-us/teams